Shopware6 Docker on MAC Hack

If you have ever worked with Docker on MAC (or Windows without a recent linux subsystem), you know that working can be really, really slow … at least if any significant I/O is involved.
So, if you mount lots of files as a Docker volume, you *will* always get problems, period.
Docker Sync etc. may help a bit, but usually that won’t be enough… and it adds additional complexity and problems.

Since Shopware 6 currently also mounts everything as a volume if you use Docker, the load times of the shop are pretty much horrible on MAC, something around 40 seconds (!) per page on first load.
Shopware is working on the Docker setup to improve it though, but here is a little workaround until that is available.

The trick is to only mount the folders you really need locally to work with, e.g. „custom“ (plugins) and „public“ (assets) folders into the container, instead of the complete „app“ folder.

The problem is, inside the container, you still need the other files and folders to have a working system.

So currently, the only solution is to clone the full GIT repo locally (on the host), adjust the standard docker-compose.yml file (change the volumes), lauch the containers and then, inside the container, basically clone everything again – so that is exists there, but is not mounted/connected to the „outside“ file system.

Here are the steps involved!

git clone https://github.com/shopware/development.git shopware_development
cd shopware_development
# optionally, clone platform, too
git clone git@github.com:shopware/platform.git

in docker-compose.yml, change

volumes:
- .:/app
- ~/.composer:/.composer

to

volumes:
- ./custom:/app/custom
- ./public:/app/public
- ~/.npm:/.npm
- ~/.composer:/.composer

Not sure anymore why I’ve added .npm here, might not be necessary 🙂

Now start the Docker containers with:

./psh.phar docker:start

Login as root to adjust folder rights…

./psh.phar docker:ssh-root
chown -R 501:dialout /app
exit

To make sure Mysql is still running, run „docker-compose up -d“ (or ./psh.phar docker:start)

Now go into the container again, this time as a regular user and basically clone the repo again – I’ve experimented with GIT „init + remote add … + reset –hard“ here to possibly keep the 2 mounted folders, but it wouldn’t let me clone then or throw some permission errors, so in the end I’ve deleted them:

./psh.phar docker:ssh
# inside the "app" folder here, there are only "public" and "custom"
# so we have to remove them and clone the complete repo again, inside the container!
rm -Rf custom public # may give docker warnings like "device busy", but should work ...
git clone https://github.com/shopware/development.git .
# optionally, clone platform
git clone https://github.com/shopware/platform.git

Then, still inside the container (!) run the Shopware installation all at once (may break because mysql container exits)

./psh.phar install

OR, execute the single steps, also inside the container (recommended as of now):

./psh.phar init
./psh.phar demo-data
./psh.phar storefront:init
./psh.phar administration:init

If the mysql container exits (that may happen a couple of times during the command executions), run „docker-compose up -d“ (or ./psh.phar docker:start) in another shell to start it again

Finally, open localhost:8000/ 🙂 It should look something like this now on your MAC:

SW6_MAC_Docker


How to call methods of a VueJS app from outside

While working on my VueJs product configurator I faced the challenge to call functions in a VueJs app from „outside“, meaning the VueJs app is e.g. integrated into a PHP shopping application like Oxid eShop, Shopware or Magento and I have to e.g. check the state of the current configuration inside the VueJs app.

In particular, I had to check if the configuration is finished when the „to basket“ button on the detail page of the shop is clicked and of course get the configured product back from the app to add it to the basket.

One way I’ve found to achieve this it to save the VueJs instance into a global window variable like this:

window.confApp = new Vue({
    el:’#configurator‘,
    render(h) {
        return h(App, {
            props: {
                apiUrl:this.$el.attributes.apiUrl.value
            }
        })
    }
})


This way, you can access it from anywhere on the page and add a script to a Smarty template of the shop e.g.:

$(function() {
    $(‚#toBasket‘).on(‚click‘, function(e) {
        console.log(window.confApp);
        return true;
    }
});


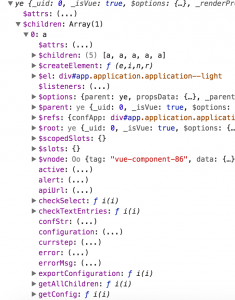
Now, to find the Vue Component inside the Vue object you can inspect the object in the browser console, it is probably nested in the „$children“ array of the Vue instance:

You can see the functions of the Component in the screenshot, the one we need is the „exportConfiguration“ which can now be called like this:

$(function() {
    $(‚#toBasket‘).on(‚click‘, function(e) {
        // get global configurator VUE instance

        var configurator = window.confApp.$children[0];
        var configuration = configurator.exportConfiguration();
        if (!configuration) {
            return false;
        }
        return true;
     }
});


Shopware 5.3. Plugins erstellen mit den Shopware CLI Tools

Die Shopware CLI Tools ermöglichen es, das Erstellen von Plugins erheblich zu beschleunigen – egal ob es um Frontend-, Backend- oder API-Plugins (oder eine beliebige Kombination davon) geht. Im folgenden ein Beispiel für ein solches „Multi-Feature“-Plugin.

Shopware CLI Tools Installation

Wir erstellen mit den CLI Tools ein Plugin mit dem einfallsreichen Namen „MyTest01“, hierzu ist folgendes nötig:

  1. Die Shopware CLI Tools gehören nicht zum Shopware „Lieferumfang“ und müssen erst installiert werden, empfohlen wird hier der Download eines „Phar“-Releases.
  2. Man kann das Phar z.B. im Shopware-Hauptverzeichnis nach „bin/“ kopieren und der Einfachheit halber in „sw“ umbenennen.

Shopware CLI Tools Verwendung

Danach sind die Tools einsatzbereit. Hier ein Aufruf, welcher ein Plugin mit Frontend-, Backend- und API-Komponenten generiert:

./bin/sw plugin:create –haveApi –haveBackend –haveModels –haveFrontend –haveCommands –backendModel=MyTest01\\Models\\MyTest01Model MyTest01

Problem mit Backend Model CLI Generierung

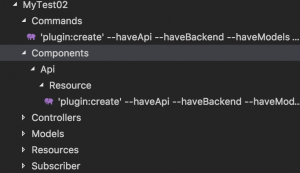
Lässt man den Parameter „–backendModel“ beim Aufruf weg, so kann bzw, muss man das Model interaktiv in der CLI angeben:

Wichtig ist in beiden Fällen, den kompletten Pfad bzw. Namespace mit anzugeben! Allerdings hatte ich mit der interaktiven Methode keinen Erfolg, es wurden keine gültigen Dateinamen generiert, sondern die kompletten CLI-Kommandos inkl. Parameter wurden als Namen verwendet – was zu ungültigen Datei- und Klassenamen wie diesen führt:

class ‚plugin:create‘ –haveApi –haveBackend –haveModels –haveFrontend –haveCommands MyTest02 extends ShopwareCommand

Kann evtl. an noch fehlender Kompatiblität mit Shopware 5.3. liegen, ich habe bisher mit älteren Versionen nicht getestet – oder es hat sich aktuell ein Bug beim Verarbeiten der Parameter eingeschlichen.

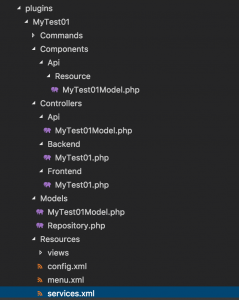
Übergibt man das „backendModel“ allerdings als Parameter, klappt die Generierung soweit:

Nach dem Generieren sollte man die Plugin-Liste aktualisieren (und ggf. den Cache leeren) mit:

./bin/console sw:plugin:refresh
./bin/console sw:cache:clear

Probleme mit der API Generierung

Allerdings gibt es dann noch weitere kleine Probleme mit dem generierten Code, zumindest in der aktuellen Version 5.3 und falls man den Parameter „–haveApi“ bei der Generierung angibt.

Das erste Problem ist ein Fatal Error, der auftritt und ungefähr so lautet:

PHP Fatal error: Uncaught TypeError:
Argument 1 passed to MyTest01\\Subscriber\\ApiSubscriber::__construct() must be an instance of
Shopware\\Recovery\\Common\\DependencyInjection\\ContainerInterface, instance of
ShopwareProduction4a3b86fd9a3e955627adbda985118ae3e2bdc589ProjectContainer given

Sieht man sich die generierten Klassen an und vergleicht mit ähnlichen Klassen im Shopware Sourcecode selbst, findet man irgendwann das Problem: in der generierten Datei  „MyTest01\Subscriber\ApiSubscriber.php“ wird ein falsches Interface verwendet, man muss also folgendes ändern:

//use Shopware\Recovery\Common\DependencyInjection\ContainerInterface;
use Symfony\Component\DependencyInjection\ContainerInterface;

Ausserdem muss, falls nicht vorhanden, dem Subscriber der „service_container“ als Argument in der „services.xml“-Datei mitgegeben werden, z.B.

<service id=“my_test01.subscriber.api_subscriber“ class=“MyTest01\Subscriber\ApiSubscriber“>
<argument id=“service_container“ type=“service“/>
<tag name=“shopware.event_subscriber“/>
</service>


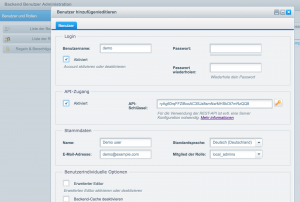
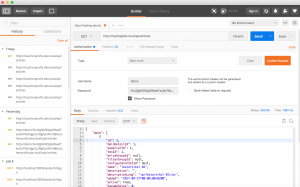
Das letzte Problem schliesslich tritt auf, wenn man versucht, die API URL „/api/mytest01model“ aufzurufen (nachdem man vorher im Backend einen API-Key generiert hat, den man dann für das Login als Passwort nutzen kann), gibt es ebenfalls einen „Fatal Error“ a lá:

PHP Fatal error: Uncaught Error: Class ‚Shopware\\Components\\Api\\Resource\\MyTest01Model‘ not found in
/var/www/html/engine/Shopware/Components/Api/Manager.php:55\nStack trace:\n#0
/var/www/html/custom/plugins/MyTest01/Controllers/Api/MyTest01Model.php(13):
Shopware\\Components\\Api\\Manager::getResource(‚MyTest01Model‘)\n#1 /var/www/html/engine/Library/Enlight/Class.php(74):
Shopware_Controllers_Api_MyTest01Model->init()\n#2 /var/www/html/engine/Library/Enlight/Controller/Action.php(101):

Hier muss man zwei Dinge anpassen:

in „MyTest01\Components\Api\Resource\MyTest01Model.php“ den Namespace ändern auf:

//namespace Shopware\Components\Api\Resource;
namespace MyTest01\Components\Api\Resource;

sowie in „Resources\services.xml“ den neuen Service definieren:

<service id=“shopware.api.mytest01model“ class=“MyTest01\Components\Api\Resource\MyTest01Model“>
</service>

Fall übrigens durch ein fehlerhaftes Modul auch das Backend nicht mehr funktioniert, kann man das betroffene Modul über die Kommandozeile deaktivieren mit:

./bin/console sw:plugin:uninstall MyTest01

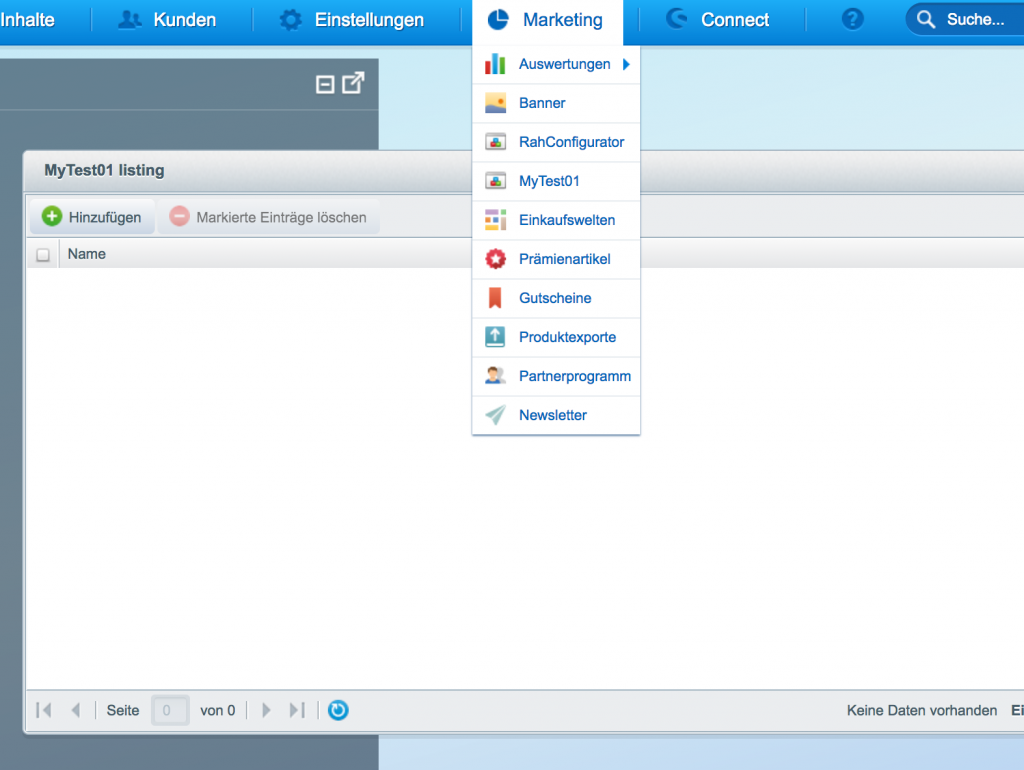
Unser Testmodul sollte nun jedoch funktionieren und nicht nur per API aufrufbar sein, sondern auch im Backend auftauchen:

Happy coding! 🙂

Use J. Wilders nginx-proxy in multiple docker-compose projects

There is an awesome project for Docker if you want to run e.g. multiple webserver containers on the same ports on one host machine, say Apache or Nginx on port 80: jwilder/nginx-proxy.

Nginx-Proxy for Docker

You have to expose the port 80 in the Dockerfile as usual, but you don’t explicitly map the port in your docker-compose.yml or when using „docker run …“. Instead, you let the nginx-proxy do the heavy work and forward the requests to the right container. Therefore, you add an environment variable for the proxy:

environment:
 VIRTUAL_HOST: myapp.dev.local

so that it knows which request to forward to which container.

If you want to start multiple docker-compose.yml files, you can’t just add the nginx-proxy container to all the docker-compose.yml files though. If you only had one docker-compose project with e.g. multiple webservers on port 80, you could just add one proxy container to your YAML:

nginx-proxy:
    image: jwilder/nginx-proxy
    container_name: nginx-proxy
    ports:
      - "80:80"
    volumes:
      - /var/run/docker.sock:/tmp/docker.sock:ro

The Problem

But if you have multiple projects, there would be conflicts with this approach since there can only be one container with any given name – and you do only want one nginx-proxy across projects after all! Unfortunately, docker (compose) does not allow existing containers (yet?) and throws an error if you try to start the same container multiple times.

If you want to share the proxy container for different projects, you should also use an external network in your docker-compose.yml files like so (see github.com/jwilder/nginx-proxy/issues/552):

networks:
  default:
    external:
      name: nginx-proxy

Be aware that if you do this, you have to manually create the network before you run „docker-compose up -d“:

docker network create nginx-proxy

The Solution

solution for using the proxy accross projects would be to check for the network and nginx-proxy container before each call to „docker-compose up -d“. One way to do this is with a Makefile, e.g. in your „make start“ or „make up“ commands, you could call a shell script which does those checks for you:

start:
 ./config/run-proxy.sh
 docker-compose start

up:
 ./config/run-proxy.sh
 docker-compose up -d

This way, the script would create the required network and/or the proxy container if either of them doesn’t exist yet. So all the running projects / containers can share the global proxy container in the global network.

The Details

So, here is an example docker-compose.yml and also an example bash script (run-proxy.sh):

#!/bin/bash
##########################################################################
# script to check if the jwilder proxy container is already running
# and if the ngnix-proxy network exists
# should be called before "docker-compose up -d"
##########################################################################

if [ ! "$(docker network ls | grep nginx-proxy)" ]; then
  echo "Creating nginx-proxy network ..."
  docker network create nginx-proxy
else
  echo "nginx-proxy network exists."
fi

if [ ! "$(docker ps | grep nginx-proxy)" ]; then
    if [ "$(docker ps -aq -f name=nginx-proxy)" ]; then
        # cleanup
        echo "Cleaning Nginx Proxy ..."
        docker rm nginx-proxy
    fi
    # run your container in our global network shared by different projects
    echo "Running Nginx Proxy in global nginx-proxy network ..."
    docker run -d --name nginx-proxy -p 80:80 --network=nginx-proxy -v /var/run/docker.sock:/tmp/docker.sock:ro jwilder/nginx-proxy
else
  echo "Nginx Proxy already running."
fi

And, for reference – an example docker-compose.yml:

version: '2'
services:

  shopware:
    image: docker.myregistry.de/docker/php7-apache/image
    container_name: appswdemo
    environment:
     VIRTUAL_HOST: shopware.dev.local
     VIRTUAL_PORT: 80
     DB_HOST: db
     SHOPWARE_VERSION: 5.3
    volumes:
     - ./config/config.php:/var/www/html/config.php
     - ./src/pluginslocal:/var/www/html/engine/Shopware/Plugins/Local
     - ./src/plugins:/var/www/html/custom/plugins
     - ./src/customtheme:/var/www/html/themes/customtheme
    links:
    - db

  # data only container for persistence
  dbdata:
    container_name: dbdataswdemo
    image: mysql:5.6
    entrypoint: /bin/bash
  db:
    image: mysql:5.6
    container_name: dbswdemo
    environment:
        MYSQL_ROOT_PASSWORD: root
        MYSQL_DATABASE: shopware
        MYSQL_USER: shopware
        MYSQL_PASSWORD: shopware
        TERM: xterm
    volumes_from:
      - dbdata

  phpmyadmin:
    image: phpmyadmin/phpmyadmin
    environment:
      VIRTUAL_HOST: shopwaredb.dev.local
      VIRTUAL_PORT: 8080
      PMA_ARBITRARY: 1
      MYSQL_USER: shopware
      MYSQL_PASSWORD: shopware
      MYSQL_ROOT_PASSWORD: root
    links:
      - "db:db"

networks:
  default:
    external:
      name: nginx-proxy

As you can see, the web container („shopware“ in this example), which runs Apache and PHP 7 in this case, doesn’t map any explicit ports, it only tells the proxy its URL and „virtual port“, but there is no „ports:“ section in the YML file. Same goes for the „phpmyadmin“ container.

And finally, the relevant parts of the Makefile:

ARGS = $(filter-out $@,$(MAKECMDGOALS))
MAKEFLAGS += --silent
start:
 ./run-proxy.sh
 docker-compose start
up:
 ./run-proxy.sh
 docker-compose up -d
#############################
# Argument fix workaround
#############################
%:
 @:

nginx-proxy would now forward all requests to shopware.dev.local to the PHP / Apache container on port 80 and also shopwaredb.dev.local to the PhpMyAdmin container on Port 8080, and you could start more containers on port 80 and 8080 (PhpMyAdmin) without any port conflicts on your host!