Shopware6 Docker on MAC Hack

If you have ever worked with Docker on MAC (or Windows without a recent linux subsystem), you know that working can be really, really slow … at least if any significant I/O is involved.
So, if you mount lots of files as a Docker volume, you *will* always get problems, period.
Docker Sync etc. may help a bit, but usually that won’t be enough… and it adds additional complexity and problems.

Since Shopware 6 currently also mounts everything as a volume if you use Docker, the load times of the shop are pretty much horrible on MAC, something around 40 seconds (!) per page on first load.
Shopware is working on the Docker setup to improve it though, but here is a little workaround until that is available.

The trick is to only mount the folders you really need locally to work with, e.g. „custom“ (plugins) and „public“ (assets) folders into the container, instead of the complete „app“ folder.

The problem is, inside the container, you still need the other files and folders to have a working system.

So currently, the only solution is to clone the full GIT repo locally (on the host), adjust the standard docker-compose.yml file (change the volumes), lauch the containers and then, inside the container, basically clone everything again – so that is exists there, but is not mounted/connected to the „outside“ file system.

Here are the steps involved!

git clone https://github.com/shopware/development.git shopware_development
cd shopware_development
# optionally, clone platform, too
git clone git@github.com:shopware/platform.git

in docker-compose.yml, change

volumes:
- .:/app
- ~/.composer:/.composer

to

volumes:
- ./custom:/app/custom
- ./public:/app/public
- ~/.npm:/.npm
- ~/.composer:/.composer

Not sure anymore why I’ve added .npm here, might not be necessary 🙂

Now start the Docker containers with:

./psh.phar docker:start

Login as root to adjust folder rights…

./psh.phar docker:ssh-root
chown -R 501:dialout /app
exit

To make sure Mysql is still running, run „docker-compose up -d“ (or ./psh.phar docker:start)

Now go into the container again, this time as a regular user and basically clone the repo again – I’ve experimented with GIT „init + remote add … + reset –hard“ here to possibly keep the 2 mounted folders, but it wouldn’t let me clone then or throw some permission errors, so in the end I’ve deleted them:

./psh.phar docker:ssh
# inside the "app" folder here, there are only "public" and "custom"
# so we have to remove them and clone the complete repo again, inside the container!
rm -Rf custom public # may give docker warnings like "device busy", but should work ...
git clone https://github.com/shopware/development.git .
# optionally, clone platform
git clone https://github.com/shopware/platform.git

Then, still inside the container (!) run the Shopware installation all at once (may break because mysql container exits)

./psh.phar install

OR, execute the single steps, also inside the container (recommended as of now):

./psh.phar init
./psh.phar demo-data
./psh.phar storefront:init
./psh.phar administration:init

If the mysql container exits (that may happen a couple of times during the command executions), run „docker-compose up -d“ (or ./psh.phar docker:start) in another shell to start it again

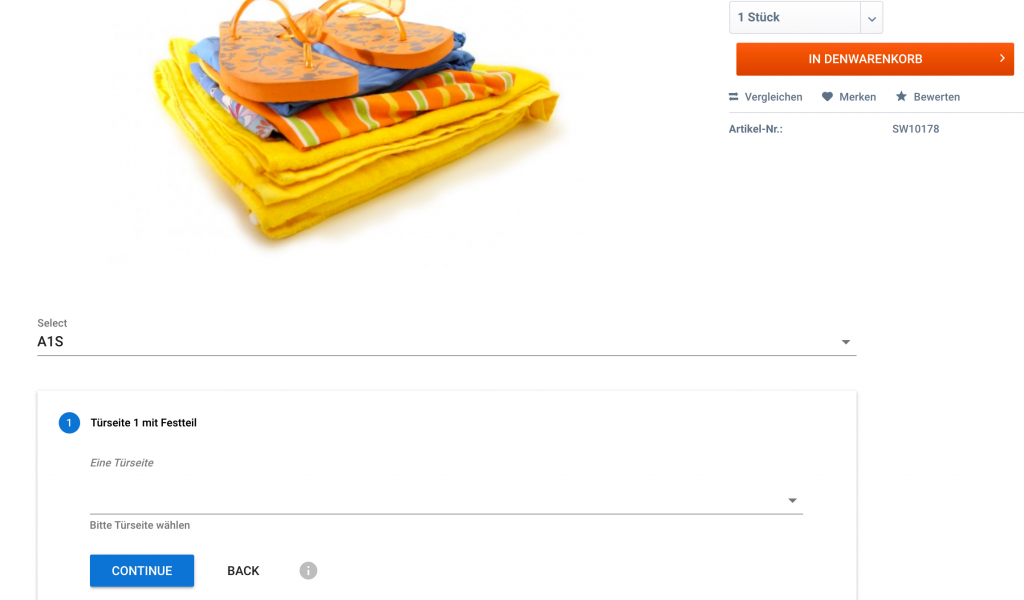
Finally, open localhost:8000/ 🙂 It should look something like this now on your MAC:

SW6_MAC_Docker


PHP MySQL GELF und JSON Polling Graylog Plugins verfügbar

Bei einem Projekt ergab sich kürzlich die Notwendigkeit, MySQL Statusinformationen in ein Graylog Logging System zu bekommen. Allerdings durfte der Webserver durch die Firmen-Firewall nur über die Standard-Ports 80 und 443 nach aussen kommunizieren und konnte so nicht z.B. über UDP selbst Daten an Graylog senden.
Daher entstanden zwei kleine Graylog-Plugins, um einerseits die Daten (mittels PHP) über das Internet verfügbar zu machen und andererseits diese Daten vom Graylog-Server aus mittels „Polling“ abzuholen. Dies übernimmt ein sog. Graylog Input-Plugin (Java).  Beide Plugins stehen im Graylog Marketplace kostenlos zum Download zur Verfügung.

How to call methods of a VueJS app from outside

While working on my VueJs product configurator I faced the challenge to call functions in a VueJs app from „outside“, meaning the VueJs app is e.g. integrated into a PHP shopping application like Oxid eShop, Shopware or Magento and I have to e.g. check the state of the current configuration inside the VueJs app.

In particular, I had to check if the configuration is finished when the „to basket“ button on the detail page of the shop is clicked and of course get the configured product back from the app to add it to the basket.

One way I’ve found to achieve this it to save the VueJs instance into a global window variable like this:

window.confApp = new Vue({
    el:’#configurator‘,
    render(h) {
        return h(App, {
            props: {
                apiUrl:this.$el.attributes.apiUrl.value
            }
        })
    }
})


This way, you can access it from anywhere on the page and add a script to a Smarty template of the shop e.g.:

$(function() {
    $(‚#toBasket‘).on(‚click‘, function(e) {
        console.log(window.confApp);
        return true;
    }
});


Now, to find the Vue Component inside the Vue object you can inspect the object in the browser console, it is probably nested in the „$children“ array of the Vue instance:

You can see the functions of the Component in the screenshot, the one we need is the „exportConfiguration“ which can now be called like this:

$(function() {
    $(‚#toBasket‘).on(‚click‘, function(e) {
        // get global configurator VUE instance

        var configurator = window.confApp.$children[0];
        var configuration = configurator.exportConfiguration();
        if (!configuration) {
            return false;
        }
        return true;
     }
});


Use J. Wilders nginx-proxy in multiple docker-compose projects

There is an awesome project for Docker if you want to run e.g. multiple webserver containers on the same ports on one host machine, say Apache or Nginx on port 80: jwilder/nginx-proxy.

Nginx-Proxy for Docker

You have to expose the port 80 in the Dockerfile as usual, but you don’t explicitly map the port in your docker-compose.yml or when using „docker run …“. Instead, you let the nginx-proxy do the heavy work and forward the requests to the right container. Therefore, you add an environment variable for the proxy:

environment:
 VIRTUAL_HOST: myapp.dev.local

so that it knows which request to forward to which container.

If you want to start multiple docker-compose.yml files, you can’t just add the nginx-proxy container to all the docker-compose.yml files though. If you only had one docker-compose project with e.g. multiple webservers on port 80, you could just add one proxy container to your YAML:

nginx-proxy:
    image: jwilder/nginx-proxy
    container_name: nginx-proxy
    ports:
      - "80:80"
    volumes:
      - /var/run/docker.sock:/tmp/docker.sock:ro

The Problem

But if you have multiple projects, there would be conflicts with this approach since there can only be one container with any given name – and you do only want one nginx-proxy across projects after all! Unfortunately, docker (compose) does not allow existing containers (yet?) and throws an error if you try to start the same container multiple times.

If you want to share the proxy container for different projects, you should also use an external network in your docker-compose.yml files like so (see github.com/jwilder/nginx-proxy/issues/552):

networks:
  default:
    external:
      name: nginx-proxy

Be aware that if you do this, you have to manually create the network before you run „docker-compose up -d“:

docker network create nginx-proxy

The Solution

solution for using the proxy accross projects would be to check for the network and nginx-proxy container before each call to „docker-compose up -d“. One way to do this is with a Makefile, e.g. in your „make start“ or „make up“ commands, you could call a shell script which does those checks for you:

start:
 ./config/run-proxy.sh
 docker-compose start

up:
 ./config/run-proxy.sh
 docker-compose up -d

This way, the script would create the required network and/or the proxy container if either of them doesn’t exist yet. So all the running projects / containers can share the global proxy container in the global network.

The Details

So, here is an example docker-compose.yml and also an example bash script (run-proxy.sh):

#!/bin/bash
##########################################################################
# script to check if the jwilder proxy container is already running
# and if the ngnix-proxy network exists
# should be called before "docker-compose up -d"
##########################################################################

if [ ! "$(docker network ls | grep nginx-proxy)" ]; then
  echo "Creating nginx-proxy network ..."
  docker network create nginx-proxy
else
  echo "nginx-proxy network exists."
fi

if [ ! "$(docker ps | grep nginx-proxy)" ]; then
    if [ "$(docker ps -aq -f name=nginx-proxy)" ]; then
        # cleanup
        echo "Cleaning Nginx Proxy ..."
        docker rm nginx-proxy
    fi
    # run your container in our global network shared by different projects
    echo "Running Nginx Proxy in global nginx-proxy network ..."
    docker run -d --name nginx-proxy -p 80:80 --network=nginx-proxy -v /var/run/docker.sock:/tmp/docker.sock:ro jwilder/nginx-proxy
else
  echo "Nginx Proxy already running."
fi

And, for reference – an example docker-compose.yml:

version: '2'
services:

  shopware:
    image: docker.myregistry.de/docker/php7-apache/image
    container_name: appswdemo
    environment:
     VIRTUAL_HOST: shopware.dev.local
     VIRTUAL_PORT: 80
     DB_HOST: db
     SHOPWARE_VERSION: 5.3
    volumes:
     - ./config/config.php:/var/www/html/config.php
     - ./src/pluginslocal:/var/www/html/engine/Shopware/Plugins/Local
     - ./src/plugins:/var/www/html/custom/plugins
     - ./src/customtheme:/var/www/html/themes/customtheme
    links:
    - db

  # data only container for persistence
  dbdata:
    container_name: dbdataswdemo
    image: mysql:5.6
    entrypoint: /bin/bash
  db:
    image: mysql:5.6
    container_name: dbswdemo
    environment:
        MYSQL_ROOT_PASSWORD: root
        MYSQL_DATABASE: shopware
        MYSQL_USER: shopware
        MYSQL_PASSWORD: shopware
        TERM: xterm
    volumes_from:
      - dbdata

  phpmyadmin:
    image: phpmyadmin/phpmyadmin
    environment:
      VIRTUAL_HOST: shopwaredb.dev.local
      VIRTUAL_PORT: 8080
      PMA_ARBITRARY: 1
      MYSQL_USER: shopware
      MYSQL_PASSWORD: shopware
      MYSQL_ROOT_PASSWORD: root
    links:
      - "db:db"

networks:
  default:
    external:
      name: nginx-proxy

As you can see, the web container („shopware“ in this example), which runs Apache and PHP 7 in this case, doesn’t map any explicit ports, it only tells the proxy its URL and „virtual port“, but there is no „ports:“ section in the YML file. Same goes for the „phpmyadmin“ container.

And finally, the relevant parts of the Makefile:

ARGS = $(filter-out $@,$(MAKECMDGOALS))
MAKEFLAGS += --silent
start:
 ./run-proxy.sh
 docker-compose start
up:
 ./run-proxy.sh
 docker-compose up -d
#############################
# Argument fix workaround
#############################
%:
 @:

nginx-proxy would now forward all requests to shopware.dev.local to the PHP / Apache container on port 80 and also shopwaredb.dev.local to the PhpMyAdmin container on Port 8080, and you could start more containers on port 80 and 8080 (PhpMyAdmin) without any port conflicts on your host!